Showing posts with label #N/A. Show all posts

Sunday, November 20, 2011

How to hide #N/A result, in Excel 2010

In Power Point presentations where there is a need to hide #N/A results for aesthetics purposes in Excel tables that were inserted in the presentation. There are two options to hide #N/A results. (A) By using IFERROR function, (B) By using the enhanced Conditional Formatting of Excel 2010.
Read section (C) below on how to hide #N/A result in Excel's print out by using Page Setup.


A) Using IFERROR function
Let’s say that sometimes one of the cells in column E can display #N/A.
In the above example cell E6 contains the function VLOOKUP(F6,$G$6:$H$10,2,FALSE) and displays the #N/A error.

The following IFERROR function, will replace #N/A with blanks:
=IFERROR(VLOOKUP(F6,$G$6:$H$10,2,FALSE),"")

B) Using the Conditional Formatting
Let’s say that sometimes cells in column C, in the above table, can display #N/A.
We will format all cells in column C in such a way that each time when the cell value is #N/A, Excel will hide the text.


  1. Click the Conditional Formatting in the ribbon of the Home TAB.
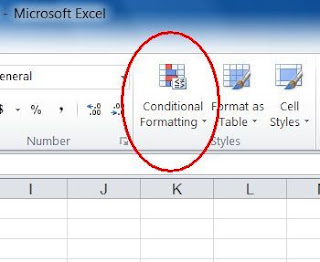
  2. Pull down menu will open.

  1. Click Manage Rules...
  2. This window will open

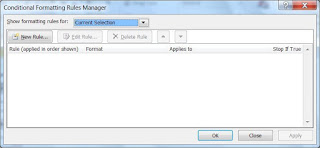
  1. In the above window, click the New Rule… button
  2. This window will open
     

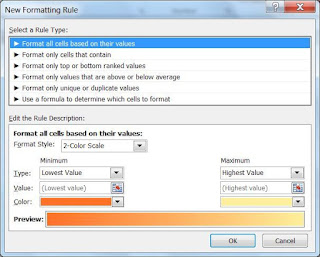
  1. Click the second line
    Format only cells that contain
  2. This window will open

  1. Click the down arrow at 'Cell Value' and select the line 'Errors'
  2.   
The window will look like this:
 

  1. Click the Format… button
    The next window will open


  1. Click the down arrow of the 'Automatic' field

Colors pallet will open.
Select No-Color (or white color) for text and click the OK button.
The next window will show up.


  1. Click the cursor in the beginning of the field Applies to

Press the keyboard Del key to delete all the text in the Applies to field.
With the mouse, mark the area in which the #N/A error will be hidden, let's say cells C3 through C10 in the above example and press the keyboard's Enter key.


If this step was done correctly the text in the Applies to field will show
=$C$3:$C$10


Click the OK button to complete the process.
Now cells with #N/A, like C4 and C8, will look empty.


C) Hide #N/A result in Excel's print out

1. Open the Page Setup, in the Page Layout TAB

2. Click the Sheet TAB, click the pulldown arrow, select <blank>, OK


 * * *

Wednesday, November 16, 2011

Replacing #N/A result with zero or with text message, in Excel

Displaying a neat result table without the #N/A text inserted automatically by the Excel can be done by using the IF function with the ISNA function.

The syntax of the ISNA function is:
=ISNA(cell location)

If the content of the cell at ‘cell location’ is #N/A the function returns TRUE otherwise FALSE. The idea is to use IF function to replace the content of the cell based on the TRUE/FALSE result received from the ISNA function.

Simple Examples
Let’s say that cell F5 contains the following formula:
=IF(ISNA(B5),0,B5)
In this example if cell B5 is #N/A then the IF function will display in cell F5 the number 0 (zero).
When B5 is not #N/A, the value in cell F5 will be the same as B5. It could be a number or a letter or text.

=IF(ISNA(B5),"Entry is out of range","Entry is OK")
The above formula was written in cell F5.
In this example when cell B5 is #N/A then cell F5 will display the message “Entry is out of range". When B5 is not #N/A then F5 will display the message “Entry is OK”.

Advance Example
There are two tables and cell F5 for message display, as in the below picture.


The content of cell A5 is entered by the user and should be one letter between A to D.

The value of cell B5 in Table-1 is taken from column B of Table-2 with LOOKUP function depends on the entry of user's input in cell A5. The content of B5 is:
=VLOOKUP(A5,A9:B12,2,0)

Cell C5 contains the number 1.

Cell D5 sums the value of B5 and C5.
=B5+C5

Cell F5 displays text message that gives feedback about the data that was entered in A5, if the data is A to D, then F5 will display “Entry is OK”, for any other input F5 will display “Entry is out of range”

Table-1 and Table-2 can be placed on different sheets or workbook.

When someone enters the letter E in cell A5 then Table-1 will look like this:


Cells B5 and D5 will show #N/A. Since the input data E can’t be found in Table-2, the VLOOKUP function in cell B5 will return #N/A and the formula in D5 will not be able to do the sum of B5+C5 thus will also return #N/A.

Let’s say that column B in Table-2 can contains only positive numbers except zero (0). We can replace now the #N/A in cell B5 with 0. This will enable Excel to do the sum in D5 and this will indicate to F5 that the input data was out of range.

To replace #N/A in B5 with zero, we will change the content of B5 to the following:
=IF(ISNA(VLOOKUP(A5,A9:B12,2,0)),0,(VLOOKUP(A5,A9:B12,2,0)))

After this change when the input data in A5 will cause #N/A in B5, the above IF function will replace it to 0.


As can be seen in the above picture, replacing the #N/A of cell B5 with zero (0) enabled Excel to do the sum in D5 though cell D5 shows now 1 which is the sum of 0 (B5) + 1 (C5).

Pay attention that the input data E is out of range but F5 message says “Entry is OK” since cell F5 checks cell B5 for not having #N/A but now B5 has the number zero so the check pass to display the positive message “Entry is OK”.

In order to correct the message displayed in F5 we will add IF function in the existing IF function and the content of cell F5 will be:
=IF(ISNA(B5),"Entry is out of range",IF(B5=0,"Entry is out of range","Entry is OK"))
The message in F5 will show now the correct message as in the below picture:


* * *